How to Change Racing Brake Pads

Changing your racing brake pads is a crucial aspect of maintaining your vehicle’s performance and safety on the track. Over time, brake pads wear down due to the intense conditions of racing, and failing to replace them can lead to decreased stopping power and potential accidents. This guide will provide you with a step-by-step approach to effectively change your brake pads, ensuring your car remains at peak performance.
Understanding the importance of proper brake pad maintenance is key for any racing enthusiast. You need to recognize the signs that indicate it’s time to change your brake pads, such as decreased responsiveness or unusual noises during braking. Additionally, using high-quality racing brake pads tailored to your vehicle’s specifications can greatly enhance your overall experience on the track.
In this guide, we will outline essential tools and materials needed for the job, as well as detailed instructions to help you execute the process safely and efficiently. Whether you are a seasoned racer or a novice, mastering the art of changing brake pads is an invaluable skill that contributes to your vehicle’s longevity and your racing success.
Selecting the Right Brake Pads for Your Race Application

Choosing the appropriate brake pads for your racing setup is crucial for achieving optimal performance on the track. Brake pads significantly impact stopping power, temperature management, and overall handling. Understanding the specific requirements of your race application is essential before making a change.
First, consider the type of racing you participate in. Different disciplines, such as road racing, rally, or drag racing, demand varying characteristics from brake pads. For instance, endurance racing may require pads that offer consistent performance over extended distances, whereas sprint races might necessitate pads that excel in short bursts of high-temperature durability.
Next, evaluate the material composition of the brake pads. Racing pads commonly fall into three categories: organic, semi-metallic, and ceramic. Organic pads provide smoother engagement and are less abrasive but may fade quickly under extreme conditions. Semi-metallic pads, on the other hand, offer greater heat resistance and exceptional stopping power, making them popular among racers. Ceramic pads typically deliver consistent performance and reduced dust but may not perform as well in high-temperature scenarios.
Another critical consideration is the temperature range in which the pads operate effectively. Each pad type has a specific temperature threshold that influences its performance. Ensure that the selected pads match the temperature profile of your braking system during race conditions to avoid premature wear or brake fade.
Additionally, compatibility with your braking system is vital. Check the specifications of your calipers and rotors to ensure that the brake pads fit correctly and work in harmony with the entire braking assembly. Mismatched components can lead to inefficient braking and potential safety risks.
Finally, don’t forget to factor in the feel of the brake pads. The modulation offers a direct impact on driver confidence and control. Test various options during practice sessions to determine which pads provide the best feedback and responsiveness based on your driving style.
By carefully selecting the right brake pads tailored to your race application, you enhance your vehicle’s stopping capabilities, ensuring safer and more effective performance on the track.
Step-by-Step Process for Removing Old Brake Pads

Before beginning the process of changing the brake pads, ensure that you have the appropriate tools ready, including a jack, jack stands, a lug wrench, and a brake caliper tool. Ensure the vehicle is parked on a level surface and the parking brake is engaged.
Start by loosening the lug nuts on the wheel where you need to change the brake pads. Do not completely remove them yet; just break their resistance while the wheel is still on the ground.
Next, using the jack, lift the vehicle until the wheel is off the ground. Once elevated, secure the vehicle with jack stands to support its weight safely.
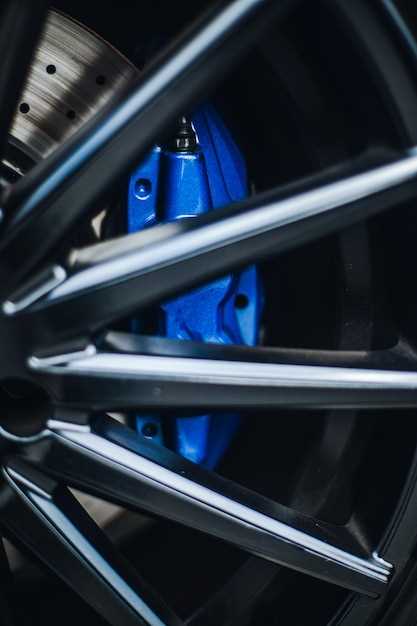
Now, remove the lug nuts completely and take off the wheel to expose the brake assembly. Locate the brake caliper, which holds the pads tightly against the rotor.
Using the appropriate tool, remove the bolts securing the caliper to the mounting bracket. Carefully slide the caliper off the rotor, taking care not to strain the brake line. It’s advisable to hang the caliper using a bungee cord or wire to prevent stress on the brake line.
With the caliper removed, you can access the old brake pads. Inspect the pads and identify how they are held in place. Typically, they are clipped or pinned into the caliper bracket. Remove these clips or pins carefully to release the pads.
Once the clips are removed, you can take out the old pads from the caliper bracket. Note the orientation of the pads, as this will help when installing the new ones.
After successfully removing the old pads, proceed to inspect the rotor for any damage or signs of wear. If necessary, consider resurfacing or replacing the rotor before installing the new brake pads.
This completes the removal process of the old brake pads, preparing you for the installation of new ones.
Proper Installation Techniques to Ensure Optimal Performance
To achieve optimal performance when changing your racing brake pads, proper installation techniques are essential. Begin by ensuring that the vehicle is securely lifted and supported. This prevents accidents and allows for safe access to the brake components. Always use a reliable jack and jack stands for this purpose.
Next, remove the wheel to gain access to the brake assembly. Inspect the brake caliper and other components for any signs of wear or damage before proceeding. When it’s time to remove the old brake pads, gently compress the caliper piston using a caliper tool, which will create space for the new, thicker brake pads.
When installing the new brake pads, ensure they are the correct fit for your specific make and model. Align the pads properly with the caliper and rotor. It’s crucial to apply a thin layer of brake grease on the backing plates of the pads to reduce noise and ensure smooth operation. Avoid applying grease to the friction material, as this can compromise braking performance.
After positioning the pads, reinstall the caliper. Ensure that all bolts are tightened to the manufacturer’s specifications. A torque wrench can help achieve the correct tightness, preventing any potential movement during braking. Finally, reattach the wheel and lower the vehicle back to the ground.
Before taking your vehicle on a test drive, pump the brake pedal a few times to seat the pads against the rotor properly. This will help establish initial contact and ensure that your brakes function correctly when needed. Following these installation techniques will maximize the performance and longevity of your racing brake pads, providing confidence during high-speed maneuvers.


